Showing posts with label sewing. Show all posts
Sunday, 26 June 2011
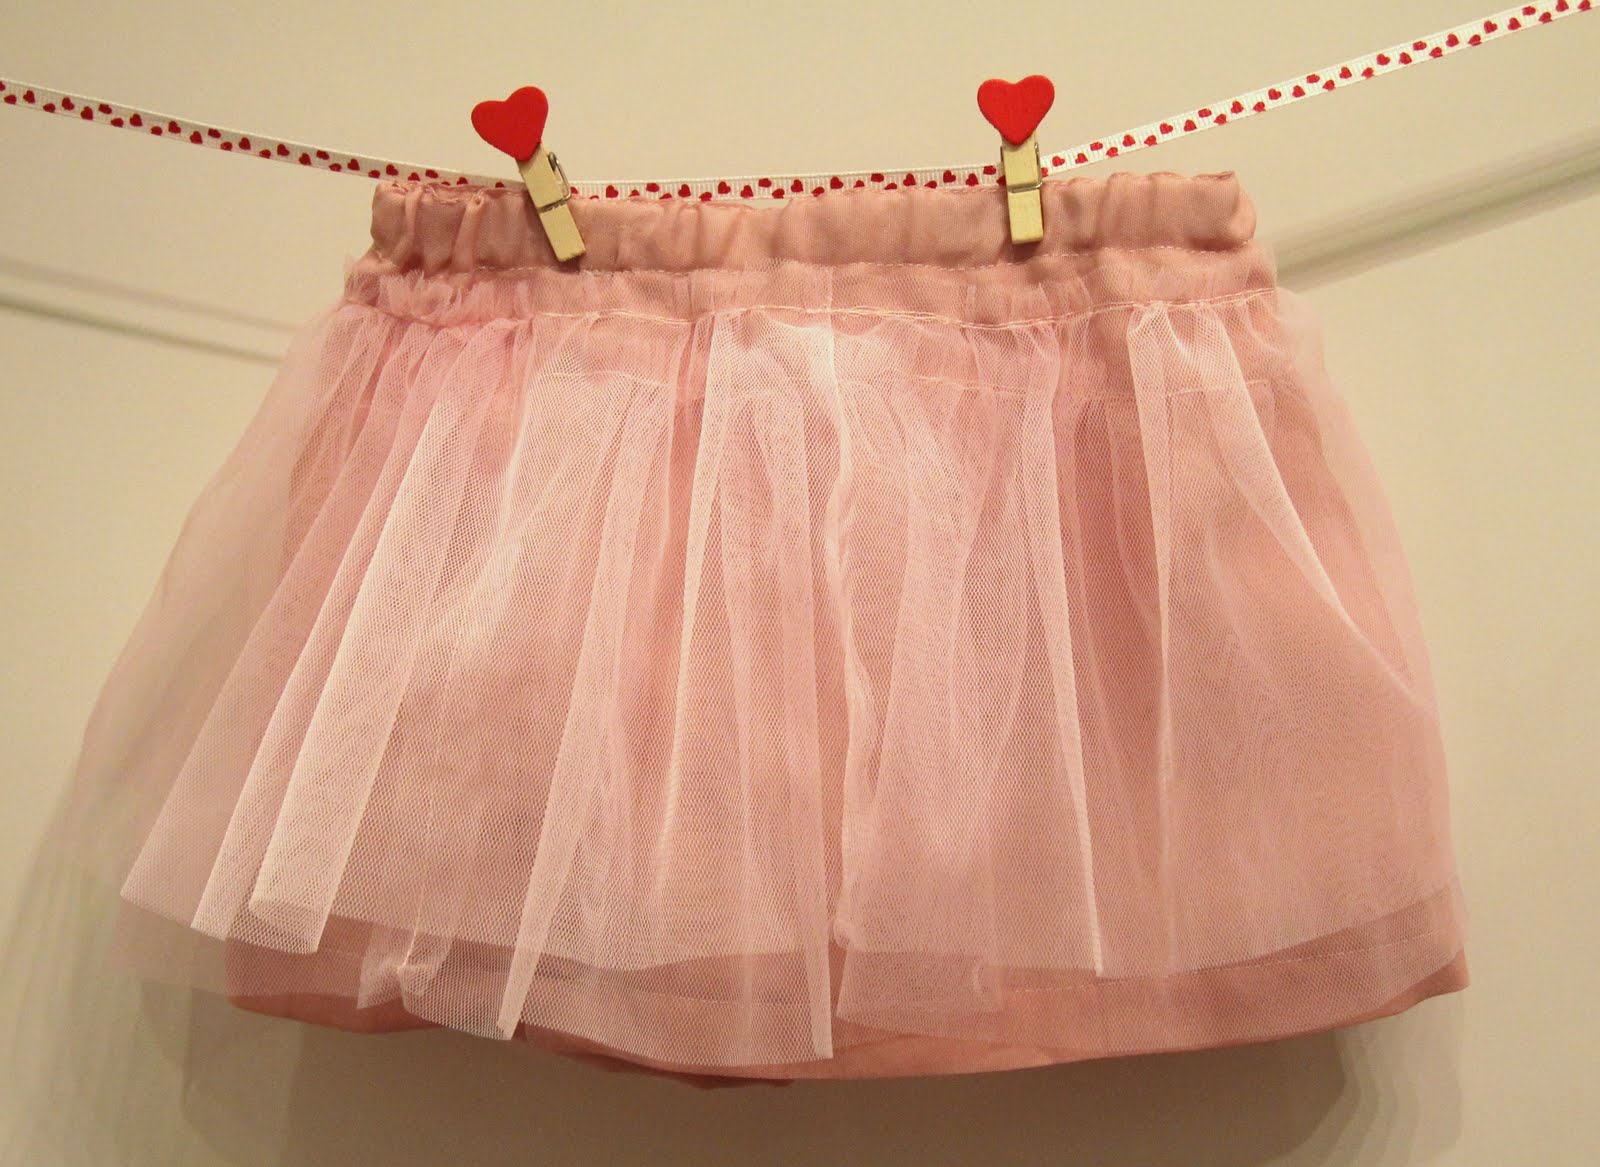
Girl's flouncy tulle skirt
I'm honestly, secretly, jealous of little girls these days - growing up in chilly Yorkshire back in the Seventies, our clothing was for the most part practical. I don't think I ever got to wear this kind of girly, tutu-like skirt. Yes, I dressed my Sindy doll in them. But never myself. Now you see them everywhere and girls young, and even a bit older, are bringing out the flounce. And I'm all for it...
I found this super simple tulle skirt tutorial on My Life A Happy Circus - a copy of a brand skirt selling for plenty of bucks: J-Crew Skirt Knock Off.
No difficult waistband here - the layers of gathered netting are simply sewn straight on top of the underskirt. Perfect for first attempts at gathering and working with tulle for the sososewer!
I opted for a 16" waist, and 9" length, as my little girl is rather petite. I used a simple polyester lining fabric rather that a knit, so I needed to overlock edges and do a proper hem.
The end result - not bad at all - the mistakes I made: not matching up one of the side seams of the tulle with the underskirt (oops!) and the not so neat gathering thread are hard to make out under all the frou-frou netting, though I'd recommend choosing a thread that matches the tulle exactly.
Lucky Lila gets to twirl around in layers of pretty pink frills to her heart's content. Mummy is jealous...!
Saturday, 25 June 2011
Little girl's pillowcase dress
After unwrapping my new machine, admittedly a little giddy like a child on Christmas morning, I played around with a few controls and stitches before diving in to a new project - my first item of clothing in donkey's years!
I used a pretty cotton print, a couple of rather fancy ribbons and some satin bias tape - never tried it before but thought I'd give it a go...
I used Emma Hardy's "Making Children's Clothes" for the pattern for her "toddler dress" - this turned out to be a wise move, as her pattern is simple to use, but also creates a nice dress with higher front neckline than back. It's a little short for older girls, at 14-15 inches, so I would extend the length but this should be simple to do.
I combined this pattern with the brilliant tutorial at Little Big Girl Studio: Pillowcase Dress Tutorial. This provided me with adequate lengths and kept the design a bit more simple - i.e. no lining but bias tape trim. I used an elastic casing as I wanted to try my hand at elastic, particularly using my new elastic machine stitch!
All in all a very simple project - start to finish in one afternoon/evening (and this for a novice using a new machine!). The results are really great. Here's hoping my little girl likes it...
Wednesday, 8 June 2011
Tutorial: Simple applique with fusible web and zig-zag stitch
Here is a quick run-down on applique with fusible web - a thin mesh of glue which attached fabrics to each other when heated. I use fusible web with no paper backing for the purpose of this tutorial.
What you need:
Fusible web
Main fabric
Applique fabric
Scissors x 2 (fabric and general craft)
Iron (steam preferred)
Step 1: Prepare pieces
Cut out fabric and fusible web for the shape you want to applique. Make sure the fusible web is cut no larger than the fabric shape, and no bits peep out from the sides! Place them on the fabric where you want to stick them.
Step 2: Iron the pieces together
Place a piece of cloth on top of the fabrics, to prevent fusible web coming into contact with your iron. Using a hot iron, on a steam setting, iron down the fabric. Check that the fabrics are glued well together before putting your iron away!
Step 3: Sew on the applique with a zig zag stitch
On my machine, you select a zig-zag stitch and a narrow stitch (between 0 and 1 length) - the length depends on how you like it - try it out first on a scrap piece of fabric first. On my machine the settings look like this:
It takes a little practice at first, but after a couple of tries, especially on the corners, it'll come! A simple technique, but a nice effect!
Tuesday, 7 June 2011
Tutorial: Easy drawstring bag
Drawstring bags are one of the simplest sewing projects, yet one of the most useful! Small ones can be whipped up as gift bags for kids' parties, and they're perfect as gift bags for birthdays, Christmas and for giving food gifts such as bread and cookies. Also great for shoe bags for storage, and sports kits for children. I made these three super-girly personalized bags for my nieces overseas for a little summer dress gift.
NB. This tutorial doesn't cover the letter applique. See here for instructions.
What you'll need
- 2 x rectangular pieces of material the same size
- ribbon or string - 2 pieces of length equal to twice the width of your rectangular fabric pieces, plus 4 inches
- safety pin
- iron/ironing board
- sewing machine
- pins
- pinking shears (optional)
Step 1: Prepare simple hems
With wrong side facing up, fold down and press a 1cm hem on both pieces of fabric.Step 2: Sew hems
Still with wrong side facing up, sew the hems down, on both pieces of fabric, then press.Step 3: Sew pieces of material together
With wrong sides facing up, measure and mark 2 inches down from the top on each side, on each fabric.
Note:This assumes you will be using a narrow ribbon for the drawstring - this width is double the width of the drawstring hole - if you are using wider ribbon, you will need to increase this width.
Place right sides together and pin. Sew around the edge, starting and ending at the 2 inch mark, and leaving a 1cm border.
Optional: trim edge and finish with zig-zag stitch or serger, or alternatively leave pinked if you have cut using pinking shears.
Step 4: Prepare and sew fold for ribbon insert
Fold and press at 1 inch point (i.e. half way to 2 inch mark and the start of your stitching. Repeat with the second side.
Pin around the bottom of this fold, ensuring that you fold over the seam allowance as you go.
Stitch close to the bottom edge all the way round both sides of fabric.
Press.
Step 5: Insert drawstring 1
Using a safety pin on one end insert one ribbon inside one of the stitched 'tubes', entering the second 'tube' on exiting the first, so the two ends of the ribbon meet again at the starting entry point.
Saturday, 4 June 2011
Children's apron
Cute children's aprons are quick and easy to make, and very popular with little ones! Read on for tips on making!
One of my first projects was children's aprons for my two little ones. Lila was to get a pink spotted version, and Aran a blue elephant print one. I copied the very simple design of my sister's daughters' aprons, but keeping the under-arm line straight for simplicity rather than rounded.
I used bought spotted ribbon for Lila's straps, for speed, but for Aran's I made straps out of matching fabric. It didn't take too long, and actually looked much more professional, though Lila's spotted straps are still cute!
For personalization I tried my hand at applique letters. I hadn't discovered fusible web, but simply cut out letters, using paper templates, then pinned and sewed them onto the front fabric using a zig-zag stitch. For Lila's apron the applique fabric was white and quite thin so I used 2 pieces together, though I should have used plain white fabric lining to avoid seeing the dark pink spotted fabric underneath.
See also applique tutorial for details.
All in all it was a very simple project - the hardest part being working out how/where to attach the straps to ensure they end up inside the wrong sides of the apron!
Note: apron is perfect size for a 3 year old (though my 18-month old can also wear it). Basic measurements were as follows:
And one more touch - using ready-made quilting material, I made little play oven gloves for their kitchen too...
Subscribe to:
Posts (Atom)

